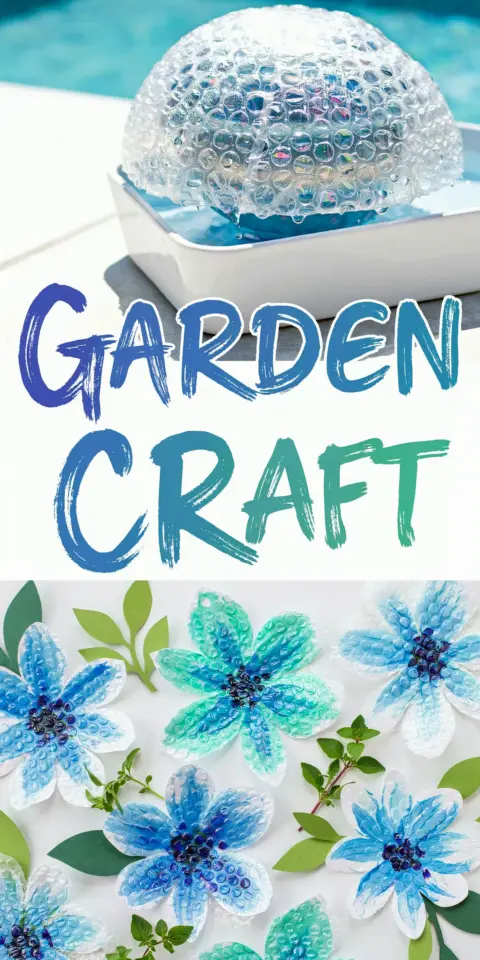
If you are looking for a fresh, low mess craft that captures the soft, clustered look of real hydrangeas, try bubble art hydrangeas. This technique uses ordinary soap bubbles tinted with liquid watercolors to create delicate prints that mimic the rounded flower heads of hydrangeas. It has become a quiet favorite among garden loving families this spring, especially since it works for toddlers, teens, and adults alike. The best part? You likely have most of the supplies in your kitchen already. Let me show you how to turn a rainy afternoon into a beautiful garden craft that feels both trendy and timeless.
What You Need for Bubble Art Hydrangea Supplies
Before you start blowing bubbles with intent, gather a few basic items. The beauty of this craft is that you do not need specialized art materials. I have tested several bubble solutions and found that the store bought kind works fine, but a homemade mix (one part dish soap to four parts water) gives you more control over the color intensity.
- White cardstock or watercolor paper – heavier paper absorbs the colored bubbles without buckling.
- Liquid watercolors or food coloring – blues, purples, pinks, and greens work best for hydrangea blooms.
- Dish soap – a mild, dye free soap like Dawn or Seventh Generation.
- Straws – reusable silicone straws are great, but standard plastic straws also do the job.
- Small shallow bowls or cups – one for each color you want to print.
- Paper towels and a tray – trust me, you will want a contained workspace.
That is really it. No paintbrushes, no stencils, no special tools. The bubbles do all the artistic work for you.
Step by Step Guide to Making Bubble Prints
This process is almost ridiculously simple, but the results look surprisingly sophisticated. First, mix a small amount of liquid watercolor (or a few drops of food coloring) into your bubble solution in a shallow bowl. Stir gently until you get a rich tone. A little color goes a long way, so start with five to seven drops and test a bubble on a scrap piece of paper.
Next, place your paper flat on a tray. Dip the straw into the colored bubble solution, then blow gently upward so that a mound of bubbles forms above the rim of the cup. Immediately touch the bubble dome to the paper. The bubbles pop on contact and leave behind a circular, lace like print. Repeat this with different colors, overlapping the prints slightly to create the dense, clustered look of hydrangea flower heads.
Let the prints dry completely for a few hours. Once dry, the colors stay vibrant, and the bubbles that looked chaotic form a soft, petal like pattern. I find that using three or four shades of blue and purple layered together gives the most realistic hydrangea effect.
Why Hydrangeas Are Perfect for This Technique
Hydrangeas have a naturally rounded, mop like flower structure made of many small florets. Bubble prints, because they vary in size and overlap organically, replicate that clustered look without any effort. Other flowers like roses or tulips have more defined shapes that do not translate as well to bubble art. But hydrangeas? They were practically made for this medium.
This spring, hydrangea inspired crafts are everywhere on social media, but bubble art stands out because it feels fresh and unexpected. You are not cutting paper or gluing pom poms. You are literally painting with air and soap. That tactile, almost magical quality makes it especially appealing for teens who might feel too old for standard preschool crafts. Adults also enjoy the calming rhythm of blowing bubbles and watching the prints form.
Ideas for Using Your Bubble Art Hydrangeas
Once you have a stack of dried prints, do not let them sit in a drawer. These bubble hydrangeas deserve to shine in your home or garden. Here are a few practical ways to use them that go beyond sticking them on the fridge.
- Garden greeting cards – Cut out individual flower clusters and glue them onto blank folded cards. Add a handwritten note with a green marker stem.
- Pressed flower style wall art – Arrange several prints in a grid frame. The bubble texture looks like vintage botany prints.
- Seed packet labels – Glue small circles of bubble art onto popsicle sticks and place them in pots of hydrangea seedlings for a charming, handmade look.
- Gift wrap accents – Attach a bubble print to plain brown kraft paper with twine. It instantly elevates a hostess gift for a garden party.
I have also seen people mod podge the prints onto terra cotta pots. That makes a cute, weather resistant decoration for a porch or windowsill.
Tips for Best Results with Kids and Teens
Working with bubbles and paper can get messy, but a few simple tweaks keep the craft manageable. For younger children, use straws with a wider diameter (like smoothie straws) so they can blow more gently. If a child tends to suck instead of blow, show them how to blow upward away from the liquid. A quick practice session on a paper towel helps build confidence.
Teens and older kids can experiment with color mixing. Try blowing a base layer of pale pink bubbles, then overlay a second layer of blue bubbles. The colors blend optically, creating lilac and mauve tones that look like real hydrangea variety names. I recommend working in small batches of about ten prints, then stopping to clean up before anyone gets bored or overwhelmed. The whole activity takes about twenty minutes of active time plus drying time, which fits nicely into a weekend afternoon.
Making It a Seasonal Family Tradition
Because bubble art hydrangeas rely on the colors of spring and summer blooms, this craft naturally fits into a seasonal rotation. Consider making it an annual event: every May, when hydrangeas start budding in the garden, pull out the bubble solution and paper. Over the years, you will build a collection of prints that mark each family member’s artistic growth. My own children have folders of bubble hydrangeas from ages three to thirteen, and looking back at the color choices and bubble sizes tells a sweet story.
To keep it timely, pair your bubble art session with a real hydrangea cutting. Bring one bloom inside for color reference. Let the kids notice how many tiny florets make up one head. That observation deepens their appreciation for both the craft and the plant. You can even press a real hydrangea petal between sheets of wax paper alongside the bubble print for a mixed media keepsake.
Bubble art hydrangeas offer a rare combination: they are simple enough for a three year old to attempt, yet beautiful enough for an adult to frame. The next time you need an easy garden craft that bridges generations, mix up a batch of colored bubbles and a stack of cardstock. You will end up with cheerful, unique prints that capture the spirit of a real hydrangea bush in full bloom. Save this pin for your next craft day, and tag me when you try it. I would love to see your bubble garden take shape.
#bubbleart #hydrangeas #gardenart #kidscrafts #easycrafts
Leave a Comment