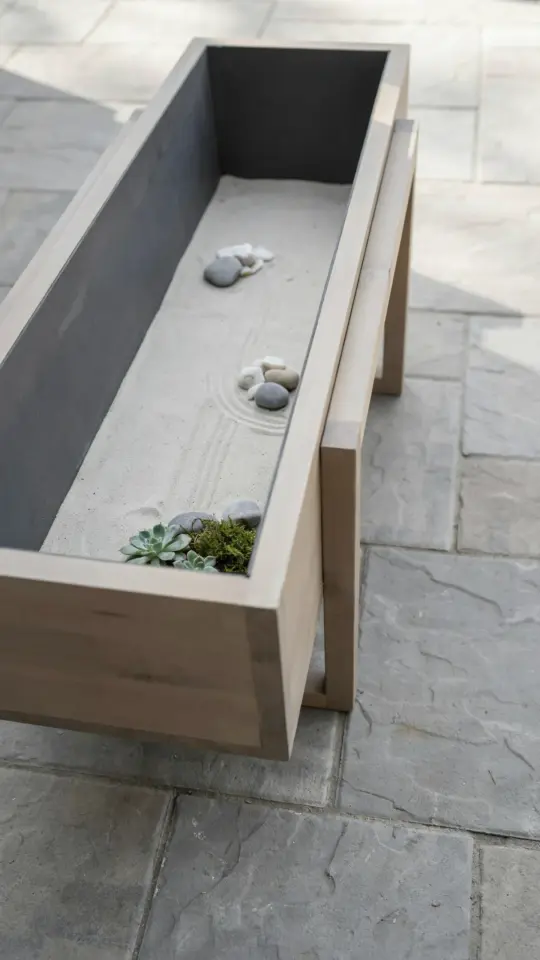
I built my first DIY Elevated Planter last spring, and it completely changed how I think about gardening in a small space. I had been struggling with back pain from bending over low pots, and my patio herbs kept getting trampled by my dog. After seeing a few expensive wooden planters online, I decided to make my own. This project turned out to be easier than I expected, and the finished planter still looks great a year later. If you want a practical, stylish way to grow herbs and flowers without breaking your budget or your back, this build is for you.
Why an Elevated Wooden Planter Makes Sense for Small Spaces
Before I built this, I kept my basil and mint in cheap plastic pots on the ground. They got knocked over, water pooled underneath, and my knees hurt after five minutes of weeding. A raised planter solves all of that. The elevated design keeps plants off the damp ground, which means fewer slugs and less rot. It also adds visual height to a flat patio, drawing the eye upward and making the area feel bigger.
On my balcony, the planter acts as a natural room divider between the seating area and the grill. The wooden frame looks warm and intentional, not like a temporary fix. For anyone with limited floor space, raising your garden is a smart way to layer greenery without crowding your feet.
Materials and Tools I Actually Used for This Garden DIY
I kept the lumber list short because I wanted a weekend project, not a two month saga. Here is what worked for me. I bought cedar boards because they resist rot naturally, but pressure treated pine is a cheaper alternative. For a planter about 24 inches tall, 18 inches wide, and 36 inches long, here is the exact cut list:
- Four legs: 2×2 lumber, each 24 inches long
- Two long side panels: 1×6 boards, each 36 inches long
- Two short side panels: 1×6 boards, each 18 inches long
- Bottom slats: four 1×4 boards, each 18 inches long (with gaps for drainage)
- One bottom support crossbar: 2×2, 18 inches long
- Wood screws (deck screws work best), wood glue, sandpaper, exterior stain or paint
Tools I needed: a circular saw (or hand saw if you are patient), a drill, a tape measure, and a square. No fancy joinery. I used simple butt joints and reinforced them with screws and glue. It held up through a rainy summer with no wobble.
Building the Frame: Steps That Saved Me Time and Frustration
I started by cutting all the lumber to size before doing any assembly. Laying everything out on the ground helped me catch a measuring mistake before I drilled holes. I attached the legs to the long side panels first. I screwed the legs flush with the top edge of each panel and let them extend 24 inches down. That gave me the raised height I wanted.
Then I attached the short side panels between the legs. I clamped each piece in place, pre drilled holes to prevent splitting, and drove screws through the legs into the panel ends. The bottom support crossbar went across the middle of the long panels, about 2 inches up from the bottom edge. That bar holds the bottom slats. I spaced the slats with a quarter inch gap between each one so water can drain out freely.
One practical tip: sand every edge before assembly. It is much harder to sand inside corners after the box is together. I learned that the hard way on my first planter and ended up with splinters every time I watered.
Finishing and Protecting Your Outdoor Decor
Raw cedar will weather to gray over time, which some people like. I wanted a warmer tone, so I applied a semi transparent exterior stain in a honey color. That took about two hours with a brush and a rag. If you use pressure treated pine, wait a few weeks for the wood to dry out before staining, or the chemicals will block the absorption.
I also lined the inside of the planter with landscape fabric. I stapled it to the sides, leaving the bottom slats open so water can escape but soil stays contained. This step is optional, but it keeps the dirt from washing out through the gaps and makes future repotting less messy. Do not use plastic liner unless you drill extra drainage holes. Stagnant water will rot the wood and drown your plants.
Planting Herbs and Flowers: What Thrived in My Raised Box
I filled the planter with a mix of potting soil and compost. Straight garden soil is too heavy and will compact in a raised box. I planted thyme and oregano along the edges because they trail slightly over the sides. Rosemary went in the back corner because it grows tall. Marigolds added a pop of orange and helped deter pests.
One thing that surprised me: the elevated planter dried out faster than ground level pots, especially on windy days. I water every other day in summer instead of every three days. Adding a layer of mulch on top of the soil helped retain moisture. Basil loved the heat and the drainage, but mint went crazy and tried to take over. Next time I will plant mint in its own pot and just place it inside the planter.
How to Adapt This Design for Different Spaces
If you have a narrow balcony, make the planter longer and skinnier. I built a second one that is only 12 inches wide but 48 inches long. It fits against a railing perfectly and holds a row of succulents. For a taller version, extend the legs to 30 inches. That makes it easier to tend plants from a seated position.
You can also add casters to the bottom of the legs. I did that for one planter so I can roll it into the sun or shade depending on the season. Just make sure the casters lock, or the planter will slide around on a smooth deck. Heavy soil makes the whole thing surprisingly stable, but locking casters give peace of mind.
Final Thoughts on This DIY Garden Project
This elevated planter took me about four hours spread over a Saturday. The total cost was around 40 dollars for cedar, screws, and stain. That is a
#DIYElevatedPlanter #GardenDIY #WoodenPlanter #OutdoorDecor #DIYGardenProjects
Leave a Comment