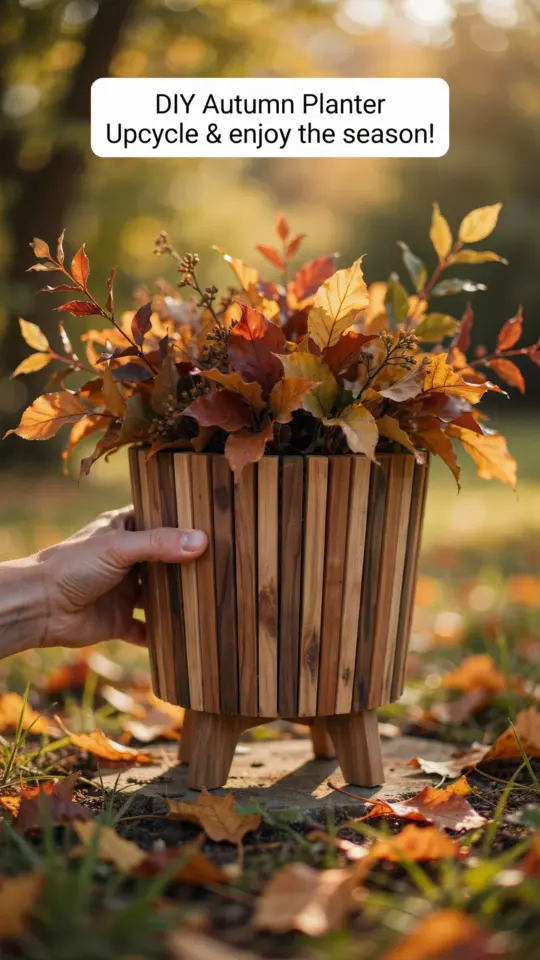
I have a confession: I am a hoarder of empty coffee canisters. For months, a stack of them sat in my garage, waiting for a purpose. Then I stumbled on a simple idea that turned them into something I actually wanted to display. This DIY fluted plant pot project not only cleared my clutter but also gave me a textured planter that looks like it came from a boutique home store. Using square wood dowels and a hot glue gun, I transformed trash into a modern farmhouse accent. Here is exactly how I did it, what worked, and what I would do differently next time.
Why I Chose Upcycled Canisters for This Planter
I wanted a planter with vertical grooves, like a fluted column. Buying new ceramic versions costs a lot. I looked at my old metal canisters and realized their straight sides were perfect. Upcycled planters feel better because they keep waste out of landfills, and they are almost free.
The secret is finding canisters that are tall and narrow. I used a 28-ounce tomato paste can and a larger 40-ounce coffee can. Make sure the metal is clean and the top rim is smooth. If there are sharp edges, file them down before you start.
Gathering Materials for Wood Dowel Crafts
For this project, I picked up square wood dowels at a craft store. They come in 36-inch lengths and cost about a dollar each. You will need around 60 dowel sticks for a standard can, but measure your canister first.
- Empty metal canister (washed and dried)
- Square wood dowels (1/4 inch or 3/8 inch wide)
- Hot glue gun and plenty of glue sticks
- Scissors or wire cutters (for snipping dowels)
- Sandpaper (optional, for smoothing ends)
- Painter’s tape or a rubber band (to hold dowels in place)
- Spray paint or sealant (if you want a color other than raw wood)
I recommend the 1/4 inch square dowels because they create a finer fluted look. Thicker ones can work but give a chunkier texture. The total cost for my project was under eight dollars, and I had leftover dowels for other crafts.
Step by Step: Creating the Fluted Texture
First, I cut each dowel to the height of my canister plus a quarter inch. I used scissors, but a small saw works better. Then I applied a line of hot glue vertically along the can and pressed a dowel against it. Hold it for ten seconds until the glue sets.
I worked around the canister, row by row. The most important tip is to use a rubber band or painter’s tape near the top and bottom to keep the dowels tight while the glue dries. Without that, they shift and leave gaps. I learned that the hard way on my first try.
Once all the dowels are glued and the band is removed, you have a fully textured cylinder. Let it cool completely before handling. If any dowel ends are uneven, sand them flush with the can rim.
Tips for Making Your Own DIY Fluted Plant Pot
Hot glue holds well on clean metal, but if your canister is painted or has a glossy finish, lightly sand the surface first. That gives the glue more grip. Also, work in a well-ventilated area because the glue smell can be strong.
I found that alternating the direction of the dowel grain (some with the natural color, some stained) created a lovely pattern. For a cohesive look, you can paint the entire planter after the dowels are glued. I used a matte white spray paint and it covered the raw wood evenly.
If you want drainage, drill a few holes in the bottom of the can before gluing. Otherwise, use this as a cachepot and keep your plant in a nursery pot inside. That is what I do, and it makes watering much easier.
Best Plants for These Upcycled Planters
Because the wood adds a warm, tactile feel, I paired my fluted pot with a succulent arrangement. The vertical lines complement the rosette shapes of echeveria and sempervivum. Small snake plants also look great because their upright leaves mimic the fluting.
Another option is to use it for pothos cuttings in water. The wood dowels hide the plain glass jar inside. I have one on my desk with a trailing philodendron, and it gets compliments every week. Just be careful not to soak the wood with water. Use a waterproof liner or seal the inside of the canister with polyurethane.
How to Seal and Protect Your Wood Dowel Craft
Raw wood can absorb moisture and warp over time. Since I plan to keep my planter indoors, I applied a clear matte sealer spray. Two light coats did the trick. If you are placing yours outside, use an outdoor sealant and make sure the canister is rust-proof.
I also painted the bottom rim of the wood dowels with a bit of clear nail polish. That prevents them from wicking up moisture if the planter sits on a damp surface
#DIYFlutedPlantPot #UpcycledPlanters #WoodDowelCrafts #GardenCrafts #DIYCrafts
Leave a Comment