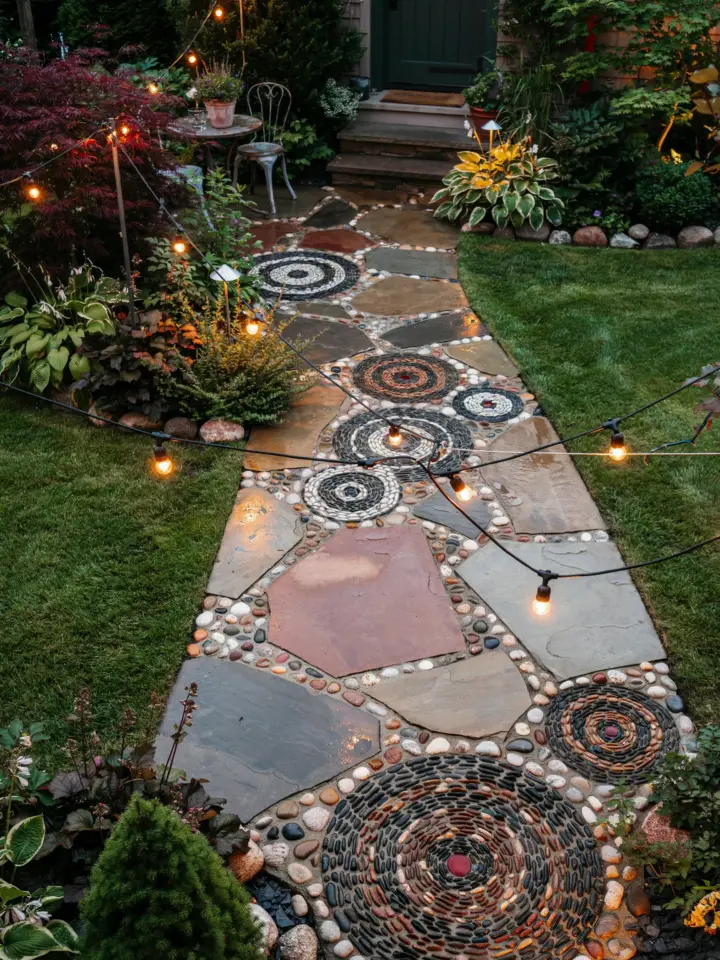
Why Most DIY Mosaic Stepping Stones Fail (And How Yours Won’t)
A mosaic garden path can completely change how your backyard feels. But if you’ve tried making your own stepping stones before, you know it’s not as simple as pressing broken tiles into concrete. I learned that the hard way. My first attempts had popped tiles, cloudy glass, and stones that crumbled after one winter freeze. After years of trial and error, I’ve found three creative tips that actually fix those common mistakes. This guide walks you through the biggest blunders and exactly how to sidestep them. No more wasted materials, just a colorful path you can be proud of.
1. Choosing the Wrong Base Material for Your Garden Stepping Stones
One of the most common mistakes is using standard concrete mix straight from the bag. That stuff cracks too easily for thin stepping stones, especially when you embed heavy glass or ceramic pieces. I once used a cheap all-purpose concrete and every single stone had hairline cracks within a month.
Instead, go for a high-strength cement mix with added polymer or a specific concrete for precast projects. You can find these at any hardware store. For even better results, add a handful of acrylic fortifier to the water. This makes your base flexible enough to handle freeze-thaw cycles without breaking.
- What to avoid: standard sand-and-cement mix, quick-set concrete with large aggregate
- What to use: polymer-modified concrete, concrete countertop mix, or mortar mix with acrylic additive
- Pro tip: Sift your gravel through a mesh screen to remove pebbles larger than a pea. Large stones create weak spots.
2. Ignoring the Weather When You Pour Your Mosaic Path Stones
I once poured stones on a hot, dry afternoon, thinking the sun would help them cure faster. Instead, the surface dried so quickly that hairline cracks appeared overnight. The moisture evaporated before the cement could fully hydrate. On the flip side, pouring in high humidity or rain can wash out the top layer and ruin your pattern.
The sweet spot is a mild day between 55 and 75 degrees Fahrenheit, with no rain expected for at least 24 hours. Work in the shade if possible, or cover your stones with a damp cloth and plastic sheeting after you set the mosaic. This keeps the moisture inside where it belongs. For more detailed guidance on outdoor mosaic garden path weather tips, check local planting zones because the same rules apply to concrete curing.
3. Forgetting to Plan Your Design Before You Start
One of the biggest mistakes is grabbing a handful of broken tiles and just pressing them into wet concrete. The result? A chaotic jumble that looks messy rather than artistic. I speak from experience. My first mosaic stepping stones looked like a toddler dropped a box of dishes.
For stunning mosaic garden path design planning, draw your pattern on paper first. Sketch each stone separately, noting where colors and shapes will go. Then lay out all your materials on a tray in that order. This step takes fifteen minutes but saves you hours of regret. Use a pencil to lightly mark the concrete surface before placing your tesserae (that’s the fancy word for tile pieces). Keep your design simple: repeating geometric patterns, concentric circles, or a single bold flower work beautifully. Leave a quarter-inch gap between pieces for grout to grab onto.
4. Using the Wrong Adhesive or Grout for Your Mosaic Crafts
Another mistake that ruins DIY garden stepping stones is picking the wrong glue. Regular white craft glue dissolves when wet. Construction adhesive can yellow over time under sunlight. I’ve seen entire mosaics pop loose because someone used standard tile adhesive intended for indoor walls.
For outdoor stepping stones, use a thin-set mortar that’s rated for exterior use. Mix it to a peanut-butter consistency. If you’re embedding glass or translucent stones, use a white thin-set so the colors shine through. For the grout, choose a sanded grout (not unsanded) to fill the wider gaps typical of mosaic work. Unsanded grout shrinks too much and cracks. Apply grout with a rubber float, wipe gently with a damp sponge, and let it cure for 48 hours before sealing.
5. Skipping the Sealant Step (A Costly Oversight)
I once thought sealant was optional. It is not. Within a year, my beautiful mosaic
#MosaicGardenPath #DIYGardenArt #GardenSteppingStones #MosaicCrafts #GardenInspiration
Leave a Comment