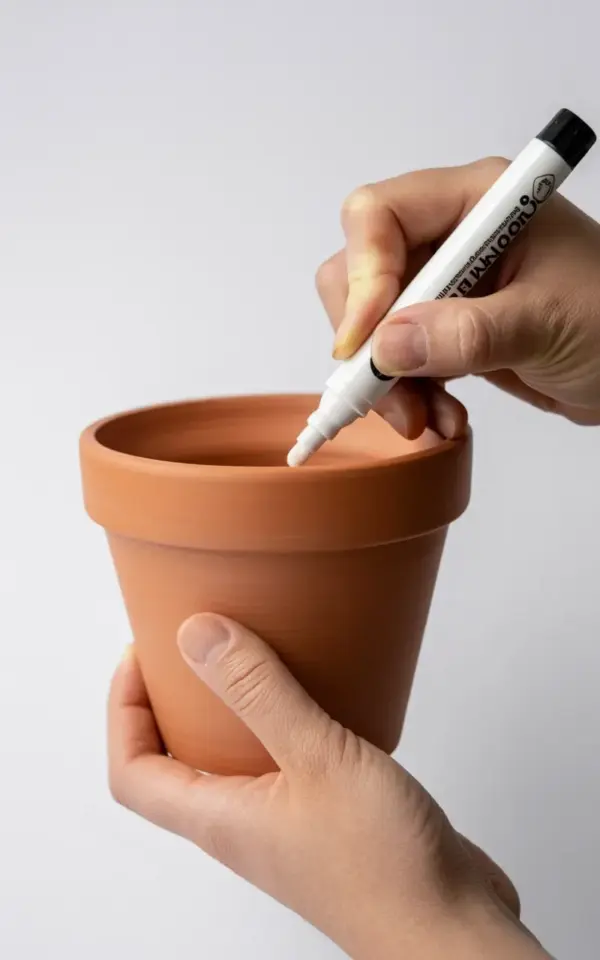
I love a simple before and after, and this painted terracotta pot before and after with a white marker is one of those projects that feels almost too easy to be real. You take a plain, cheap terracotta pot, spend maybe twenty minutes with a fine tip marker, and suddenly it looks like something from a boutique plant shop. The pot in the photo you see here started as a standard $1 cylinder from the gardening aisle. One hand supports the bottom, the other holds the white paint marker at a careful angle against the clay. Bright light, a plain white background, and those subtle shadows under the rim. It’s a small moment, but the transformation genuinely makes me smile every time I walk past my plant shelf.
Look, I have tried a dozen different ways to decorate terracotta pots. Paintbrushes, sponges, even washi tape. But a white paint marker is different. It gives you control and precision without the mess of liquid paint. And honestly, anyone can do this. Even if you have zero drawing skills. Even if you are the person who still can’t color inside the lines. This project does not care about your past art failures. It just asks you to take it slow.
Why a White Paint Marker Works So Well on Terracotta
Terracotta is porous. It drinks up liquid paint like a thirsty sponge, which is why brush painting often leaves streaky, uneven coverage. A paint marker solves that. The ink is thick and opaque, and it sits on the surface rather than soaking in. That means crisp lines and solid white coverage without needing three coats. Not gonna lie, I tried a cheap dollar store marker first and it was a disaster. The tip dried out after two strokes, and the white came out gray. So I switched to a proper white paint marker with a black grip (exactly like the one in the photo) and the difference was night and day. Spend a few extra dollars on a quality marker. It makes the whole experience satisfying instead of frustrating.
The fine tip matters more than you think. A broader tip is fine for filling in large areas, but for this pot before and after look, you want delicate lines that feel intentional. The marker in the photo has a black grip and a fine point. That lets you draw dots, dashes, thin stripes, whatever pattern you dream up. I like repeating small geometric shapes. They look modern, clean, and they are forgiving if your hand wobbles. A wobbly line just looks handcrafted. That is part of the charm.
Choosing the Right Pot for Your Makeover
Not all terracotta pots are created equal. For a pot makeover like this, I recommend a standard cylindrical shape with a wide rim. Why? Because the rim gives you a natural border to work with. You can stop your pattern just below the rim, or you can carry it over the edge. The pot in the photo has that classic shape, and the wide flat sides are a perfect canvas. Avoid pots with heavy texture or deep ridges. The marker tip will catch in the grooves and skip. Smooth clay is your friend here.
Another thing: check for cracks. Terracotta is brittle, and a tiny hairline crack will only get worse as you handle the pot. Cracks also mess with your painting because the ink bleeds into them. Not ideal. I once spent an hour on a pot only to discover a hairline crack right through my flower pattern. I wanted to throw it across the room. Save yourself the rage. Inspect the pot in good light before you start.
Also, do not skip washing the pot. I know it sounds obvious, but I have definitely grabbed a dusty pot from the garage and started painting. The dust creates a barrier. The ink beads up and refuses to stick. Just rinse it with water, scrub off any dirt, and let it dry completely. That takes fifteen minutes, but it saves you from a frustrating repaint later. Okay, sidebar: if you have a few old candle holders lying around, they work perfectly for this too. Glass ones are trickier because the marker slides, but ceramic or terracotta candle holders? Yes. Try that next.
Step by Step: How I Painted This Terracotta Pot
I set the pot on my kitchen counter with a piece of scrap paper underneath. The photo shows the pot on a plain white background, but honestly any surface works. You just need to catch any accidental ink drips. Here is exactly what I did:
- Shook the white paint marker vigorously for about thirty seconds with the cap on. You should hear the little ball inside rattling. That mixes the paint. If you skip this step you get watery ink.
- Pressed the tip down on a scrap piece of paper until the paint started flowing. A few gentle pumps, not a hard stab. The first few marks are often pale, so waste them on scrap.
- Held the pot in my non-dominant hand, like the hand in the photo, supporting the bottom. The other hand gripped the marker near the black grip zone, angled slightly to the side so I could see the tip clearly.
- Started drawing small dots in a staggered line just below the rim. I worked in a clockwise direction, rotating the pot with my supporting hand as I went. Slow and steady. If I made a mistake, I let it dry and carefully scraped it off with a fingernail.
- Added a second row of dots offset from the first. Then a simple zigzag line below that. The whole pattern took maybe eight minutes. The pot looked completely different.
Here is the thing: I did not plan the pattern beforehand. I just started with dots and let my hand decide. That improvisational feeling is half the fun. You do not need a stencil or a printed guide. Trust your eye. If you mess up, it is just terracotta. You can sand it down and start over, or paint over it with a second coat. No pressure.
The Trick Is Going Slow (Yes, Really)
I know everyone says “go slow” in tutorials and it sounds like empty advice. But with a white paint marker on a diypots project, speed is the enemy. The marker tip is saturated with paint. If you move too fast, the ink lays down unevenly. Thin spots, blobs, little puddles at the end of a line. Slow and steady pressure keeps the line consistent. I literally breathe out as I draw a line and breathe in between strokes. It sounds silly but it helps. The hands in the photo look steady, right? That is because they are moving at a deliberate, unhurried pace. Not frantic, not rushed. Just calm drawing.
Another practical tip: if you pause for more than ten seconds, recap the marker. The tip dries out quickly. And dried marker tips are a pain to revive. I once left a cap off for a minute and spent the next ten minutes trying to get the ink flowing again. Not worth it. Recap every time you set the marker down. Even if you think you will pick it right back up. Just do it. Your future self will thank you.
What Else Can You Upcycle with a White Marker?
Honestly, once you get the hang of this whitewritermarker technique, you will start seeing potential everywhere. I painted a plain ceramic mug next. It held up fine for cold drinks but I would not put it in the dishwasher. I also did a small votive candle holder, and it looked exactly like those expensive designer ones from the home decor store. The trick is the same: clean surface, fine tip, slow strokes. A plain glass jar? It works if you use a paint marker formulated for glass (most white markers are fine for porous surfaces but struggle on smooth glass). Check the label. The brand I used is for porous surfaces, so I stick to terracotta, unglazed ceramic, and some matte plastics.
I have even seen people do this on small clay pots and give them as wedding favors or housewarming gifts. A tiny pot with a simple handwritten word like “GROW” or “HOPE” in white marker feels personal and handmade. It takes five minutes. And it is way cheaper than buying custom pots. You could do a whole batch in an afternoon. That is the kind of handmadehomedecor that actually looks good, not like a craft project that screams “I made this in a hurry.”
How to Keep Your Painted Pot Looking Fresh
Here is the honest downside: white paint marker on terracotta is not waterproof. If you water your plant directly in the pot, the water will eventually soften the ink and cause it to smear. I learned this the hard way. A few days after painting a pot, I watered the plant and noticed white streaks running down the side. My perfect dots turned into sad little smudges. So now I do one of two things. Either I use the painted pot as a cachepot (a decorative outer pot with a plastic nursery pot inside), or I seal the paint with a clear matte spray sealer. The sealer changes the surface slightly, but it keeps the design intact. I use a spray made for outdoor use, applied in a well ventilated area. Two light coats, letting each dry for ten minutes. Then the pot can handle light moisture. Still not dishwasher safe, but good for normal plant care.
If you skip the sealer, do not put the pot outside in rain or direct sprinklers. The white marker will fade and run. Keep it indoors on a plant shelf where you control the watering. That is what I do. The pot in the photo lives on a shelf with indirect light, and I water the plant by lifting it out. The white pattern has stayed crisp for months. Not gonna lie, I am pretty proud of it.
Seasonal Decor Idea: Make a Custom Gift Pot
Since we are talking about a trend-aware take, here is a timely idea: the holidays are coming up, and handmade gifts feel more personal than ever. A painted terracotta pot with a small succulent or air plant makes a fantastic hostess gift, teacher gift, or office Secret Santa present. Use the white marker to write a single word or draw a simple snowflake pattern. It takes ten minutes and costs under $3 for the pot and marker combined. Pair it with a little care card and people will think you spent hours on it. I did a batch of six pots last December with white dots and tiny star shapes. Everyone assumed I bought them from a boutique. I just smiled and said thanks. It felt like a small cheat code. Try it for the next holiday or even just for a friend’s birthday. It is cheap, it is creative, and it actually looks beautiful.
One more thing: if you hate dots, try thin horizontal stripes. Or a checkerboard. Or just a single arrow pointing up. Simple designs read as modern minimalist. Overcomplicated patterns can look busy and messy on a small pot. Less is more. I draw maybe three elements per pot and stop. That restraint is what makes it look custom made rather than crafty.
So, there you have it. A plain terracotta pot, a white marker, and a little patience. That is all it takes to make something that feels fresh and personal. Try it on a candle holder next, like the Pinterest caption said. Or a small vase. Or a plant saucer. If you do, I would love to hear how it goes. Drop a comment or tag your photo with those hashtags. Happy painting, honestly.
#paintedterracottapots #potmakeover #diypots #whitewritermarker #handmadehomedecor
Leave a Comment