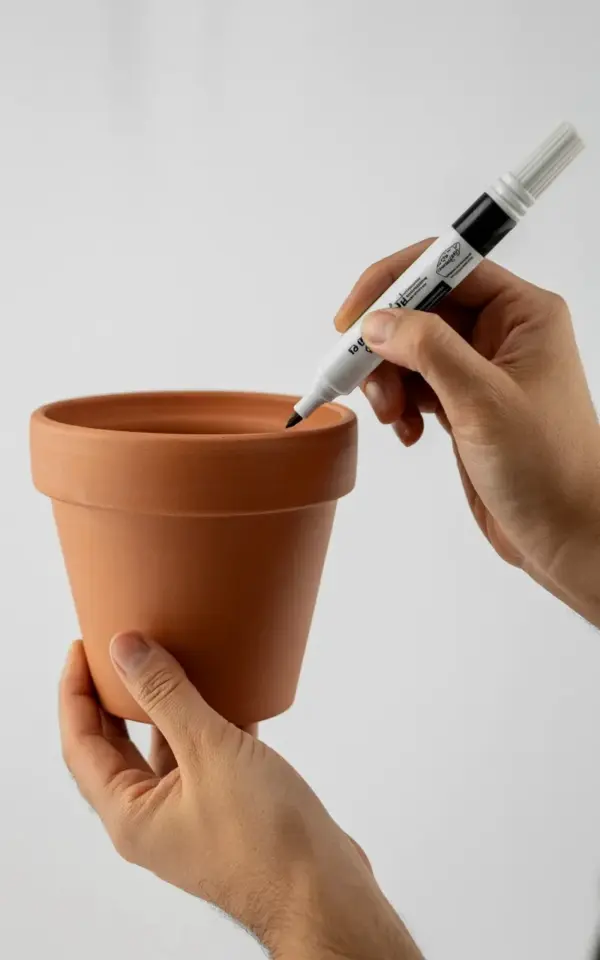
Your hands are basically made for this. You’ve got a bare terracotta pot on your table, a white paint marker with a black grip resting between your fingers, and about twenty minutes of quiet afternoon ahead of you. Painting terracotta pots is the kind of spring craft that actually gets finished, no glue gun required, no glitter fallout in your carpet. And honestly, the results look like something you’d pay twenty bucks for at a boutique plant shop.
The photo that goes with this post shows exactly what I mean. One hand cradles the bottom of a standard cylindrical pot while the other guides a white marker at a slight angle across the clay. Bright, even lighting. Plain white background. The whole scene is calm, focused, and completely doable for anyone who can hold a pen.
Why White Paint Markers Work So Well For This
Look, you could use a brush and acrylic paint. But if you’ve ever tried to paint a straight line on a curved clay surface with a brush, you know it takes a steady hand and way more patience than most of us have on a Tuesday. A paint marker solves that problem instantly.
The white paint marker in the photo has a fine tip, which means you can write, draw, and add tiny details without switching tools. The paint goes on opaque in one pass, no layering required. That’s the real win here. You screw off the cap, shake it for thirty seconds, press the tip down on a scrap piece of paper until the paint flows, and you’re ready.
One thing nobody tells you: the tip gets a little mushy after a while. It still works, but the lines get slightly thicker. That’s not a bug, it’s a feature. Your second pot will have a completely different handwriting style than your first, and that’s honestly charming.
Herb Garden Markers And Windowsill Decor
This is where I think the paint marker truly shines. You know those sad little plastic plant markers that come with seedlings and fall apart after one watering? Throw them away. A painted terracotta pot becomes its own label.
Write “Basil” in neat block letters on the front of a small pot, then add a tiny stem and leaf drawing right below it. Do the same with “Mint,” “Rosemary,” and “Chives.” Line them up on a sunny windowsill and they’ll look like a set from a cooking show.
Here’s a trick I learned the hard way: paint the herb name near the top, just under the rim. When the herbs grow tall and bushy, the leaves will cover the middle of the pot. If your lettering sits high, you can still read it. Smart, right?
Easter DIY: Bunny-Faced Pots And Pastel Accents
Easter crafts usually mean pastel everything, which is fine, but a white paint marker on terracotta is doing something different. Instead of painting the whole pot pastel pink, leave the clay bare and draw a simple bunny face on it.
Two long upright ears. Two dots for eyes. A tiny triangle nose. Little whisker lines. You don’t even need to reference a tutorial for this, it’s basically five shapes. The terracotta color keeps it from looking childish, and the white lines pop beautifully against the warm orange-brown clay.
Add a small white scalloped border along the rim if you want a touch of fancy. Or keep it bare. Both work.
If you’re gifting these for Easter, put a small succulent inside and tuck a chocolate egg next to the soil. Hand-painted pot plus plant plus candy equals a gift that looks way more thoughtful than it cost to make.
Mother’s Day Planter Ideas That Feel Personal
Here’s the thing about Mother’s Day gifts: they don’t need to be big, they need to be specific. A generic pot from the garden center says “I remembered Mother’s Day.” A terracotta pot you painted by hand says “I remember the way you say the word petunia.”
Write her initials in a graceful script. Add the year underneath. It’s classic, it’s permanent, and a white paint marker actually does a brilliant job with calligraphy styles. The opaque white paint follows your hand movement smoothly, so you can get those thin upstrokes and thick downstrokes if you work slowly.
Better yet, plant something in it that she’ll actually enjoy. Herbs are practical. A small trailing ivy looks lush and forgiving. If you want to be a little poetic, plant a mini rose and tell her it’ll grow just like her patience with you. She’ll roll her eyes, but she’ll keep the pot forever.
Going Wild: Doodle Pots And Freehand Patterns
Not everyone wants a tidy little label or a bunny face. Sometimes you just want to draw swirling patterns around the entire pot, and the white marker makes that absurdly satisfying.
Start at the bottom and draw a loose spiral. Work your way upward with waves, dots, dashes, and little flowers. The key is to not overthink it. The terracotta texture catches the paint in small grooves, so every line has a slightly handmade feel. You genuinely cannot mess this up.
One time I tried to draw a row of tiny daisies and the flowers all ended up looking like stars and one looked like a weird little octopus. I left it. No one else saw the octopus. Everyone just saw a cute, whimsical planter. Perfection is overrated.
Less Is More: Minimalist White Line Plans
A single thin line circling the middle of the pot. One small leaf shape in the center of the line. Done.
That’s the whole design, and it looks genuinely expensive. Minimalism works beautifully on terracotta because the clay itself is the main character. The white paint marker is just there to add a little structure.
You can also do a geometric approach. Triangle outlines at the rim. A grid pattern across the belly of the pot. A few scattered dots near the base. Whatever you draw with clean, deliberate spacing will look intentional.
Let me give you a quick bulleted list of simple designs that look good even if you’re not artistic:
– A single vertical stem with three leaves
– Half-moon shapes stacked in a row
– A wavy line with small dots between the waves
– You guessed it, just dots in a scattered pattern
– A crusty little heart near the bottom edge
Any of these takes under five minutes. That’s less time than it takes to choose a playlist, for crying out loud.
A Few Practical Notes Before You Start Painting
Clean the pot first. Terracotta is dusty, and if there’s dirt or factory residue on the surface, the paint won’t stick as well. A quick wipe with a damp cloth does the trick. Let it dry completely.
Test your marker on a piece of paper before you touch the pot. The first bit of paint that comes out is often watery, and watery paint wants to run down the curve of the clay. Waste that first bit on scrap paper.
Keep a cup of water and a paper towel nearby. If you make a mistake, you can actually scrub off the paint with water while it’s still wet. But here’s the catch: the marker dries fast. You’ve got maybe thirty seconds to fix a line before it’s permanent. That urgency honestly makes the whole process more fun.
Seal your pot if you plan to put it outdoors. Rain will eventually wash away your artwork. A clear acrylic sealer spray will lock it in and keep the white lines crisp. If the pot stays inside on a shelf or windowsill, you can skip the sealer altogether.
And a weird little tip from me to you: don’t buy a single paint marker if you can avoid it. Pick up either a two-pack or a fine tip set. The extra markers mean you can have backups if one dries out, and dried-out markers are the saddest thing in any craft drawer. Not gonna lie, I’ve lost more than one marker to a mysteriously disappearing cap.
Conclusion
Painting terracotta pots with a white marker is one of those rare crafts that looks impressive, costs almost nothing, and doesn’t require any natural talent. The visual proof is right there in the photo: just two hands, one pot, a marker, and a few minutes of focus.
The best time to start is now, before spring gets busy. Before the Easter brunch prep, before the Mother’s Day card scramble, before you talk yourself out of it. Grab a pot, find a marker that actually works, and draw something simple. Your windowsill will thank you.
Found this post helpful? Pin it for later or share it with a friend who loves a good craft day. Happy painting, and don’t forget to label your basil.
Leave a Comment