Why Most DIY Projects Fail Right Here
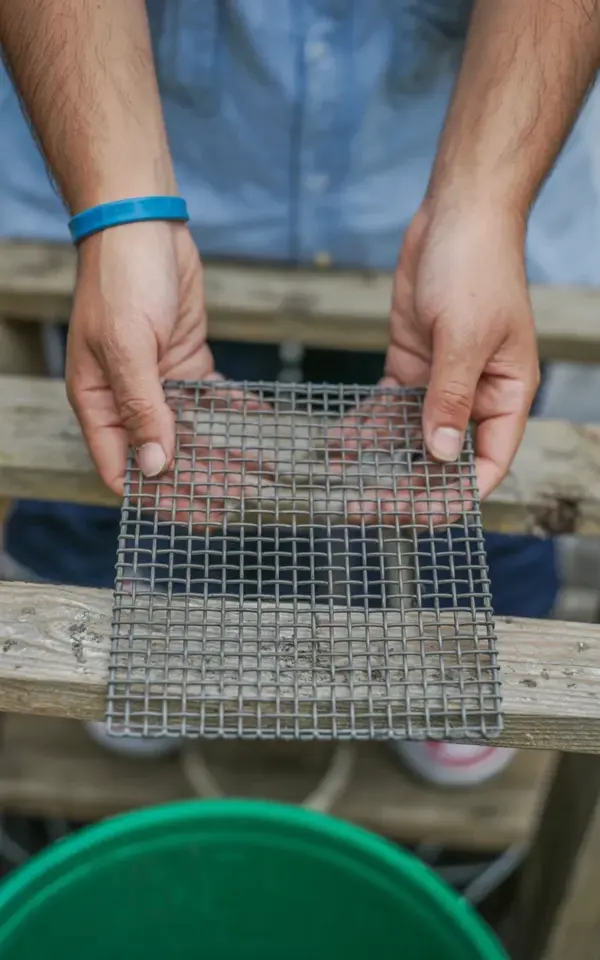
Let me show you a close-up photo of my own hands holding a sheet of silver wire mesh against an old wooden fence. You can see the weathered grain, the uniform grid, and even the blue rubber band on my wrist from a project I just finished. I learned the hard way that the number one mistake when attaching wire mesh to wood is picking the wrong fastener. Flimsy staples, tiny nails, or any half-hearted connector will let the mesh pull away over time. That sagging look? It is preventable.
I have built raised garden beds, chicken runs, and cabinet screens. Every single time, the fastener choice made or broke the job. If you are new to working with hardware cloth or any metal grid, start here: the fastener must match the mesh strength and the wood surface.
The Wrong Fasteners: What Beginners Usually Grab
When I first started, I grabbed a standard staple gun from the garage. The staples were thin, light, and meant for upholstery, not for holding steel wire against wood. Within a week, the mesh sagged in the middle. The staples popped out because they could not grip both the wire and the weathered wood fibers.
Common beginner mistakes include:
- Using standard office or craft staples (too weak)
- Choosing regular nails without washers (they pull through the mesh holes)
- Picking short screws that do not bite into solid wood behind the surface
- Using anything rust-prone near outdoor or damp areas
If you look at my photo again, you will notice the wood surface shows signs of age, light brown with visible grain. That weathered wood is more brittle than fresh lumber. A flimsy fastener will crumble the wood fibers around it and lose grip fast.
What Heavy Duty Galvanized Staples Do Differently
Heavy duty galvanized staples are thicker, longer, and coated against rust. They drive deep into the wood and hold the mesh wire securely against the surface. Look for staples labeled for exterior use or for attaching hardware cloth. The crown width should be wide enough to straddle the wire without bending it.
I have used these on my chicken coop door. The galvanized coating survives rain and humidity, and the staple legs are long enough to anchor into the wood behind the surface layer. Unlike thin staples that bend, these hold firm even when the wire gets pulled taut.
Screws with Washers: The Alternative for Permanent Fixes
Sometimes staples are not enough because the wood is too hard or too thin. In those cases, screws with washers are your backup. A screw bites deeper than any staple, and a flat washer spreads the holding pressure across a wider area of the mesh. This prevents the wire from tearing at the fastener point.
I recommend using exterior-grade screws, either stainless steel or coated deck screws. The washer should be large enough to cover the mesh hole completely. Tighten until the washer is snug against the wood, but do not overtighten or you will crush the wood fibers and lose grip.
How to Match Fasteners to Different Wood Conditions
Not all wood is the same. In my photo, the weathered wood is dry and cracked in places. That surface needs extra care. On softwoods like pine, heavy duty staples work well because the wood compresses around the staple legs. On hardwoods like oak, you might need to pre-drill holes for screws.
On painted or treated wood, avoid fasteners that can strip out. The paint or treatment can create a slippery layer. Use screws with washers for maximum hold. On damp wood, always choose galvanized or stainless steel to prevent rust streaks from bleeding onto the mesh.
A quick rule: if the wood surface looks flaky or crumbles when you touch it, go with screws and washers. If the wood is solid and smooth, heavy duty staples are fine.
Step by Step: Attaching Wire Mesh the Right Way
Here is the process I follow now, and I wish I had known it from the start. First, cut your wire mesh to size using wire cutters. Wear gloves because the edges are sharp. Second, position the mesh against the wood and check that it lies flat with no bumps.
Third, place your fasteners every 6 to 8 inches along the edges and every 12 inches in the middle. If you use staples, drive them at a slight angle so the legs cross the wire rather than sliding alongside it. If you use screws, pre-drill small pilot holes through the mesh and into the wood to avoid splitting the wood.
Fourth, check tension. The mesh should feel tight, not drum-tight, but with no sagging. Pull the mesh gently as you fasten to keep it flat.
Real Life Example: My Garden Cover Project
Last spring I built a wire mesh cover for a raised bed to keep out squirrels. I used heavy duty galvanized staples on the frame, which was fresh pine. The staples held perfectly through summer storms. My neighbor used regular office staples on the same type of wood. By fall his mesh was drooping and torn at the edges.
The difference was not the wood or the mesh. It was the fastener. That simple choice saved me time and money. If you ever wonder why your DIY wire project looks loose or fails, check the staples first. Nine times out of ten, that is the weak link.
Tools and Materials Checklist for Your Next Project
Before you start, gather these items to avoid a trip to the store mid-project:
- Heavy duty galvanized staples (1/2 inch or longer)
- Exterior screws with washers (if using screws, size #8 or #10)
- Wire cutters (tin snips work better than scissors)
- Work gloves
- Staple gun rated for heavy duty staples, or a drill for screws
- Safety glasses
I keep a small container of extra washers and screws in my toolbox. In the photo you can see a partial view of a green container in the bottom corner, that is exactly what holds my spare fasteners. Having everything ready keeps the project moving fast.
What to Do If the Mesh Already Sagged
If your mesh is already loose, you can fix it without starting over. Remove the old fasteners one at a time. Pull the mesh tight and reattach using the correct method. If the wood holes are too big from the previous fasteners, move the mesh slightly so the new fasteners bite into fresh wood. Then add extra fasteners in the sagging areas.
For large sagging sections, a row of screws with washers down the center can pull the mesh back into shape. This saves the mesh and the wood, so you do not have to buy new materials.
Final Thoughts on Making Your Project Last
Attaching wire mesh to wood seems simple, but the details matter a lot. That little blue rubber band on my wrist in the photo reminds me to keep things simple and practical. Pin this guide for your next DIY project, because the right fastener turns a frustrating job into a solid build. Next time you pick up a staple gun or a screwdriver, stop and ask: is this fastener strong enough for the mesh and the wood? If the answer is no, swap it out before you drive the first one.
I hope this saves you the headache I had. Grab some heavy duty staples or washers, get your hands dirty, and build something that stays tight for years.
#WireMesh #DIYMistakes #WoodworkingTips #HardwareCloth #HomeImprovement
Leave a Comment